Getting Started with Codespaces
Create a Codespace
A Codespace is basically Visual Studio Code running on the web. If you use VS Code on your local machine, Codespaces will be very familiar.
Use the Button
You can create codespace for the Python Level 1 repository by pressing the button below.
 Open in Codespaces
Manual Process
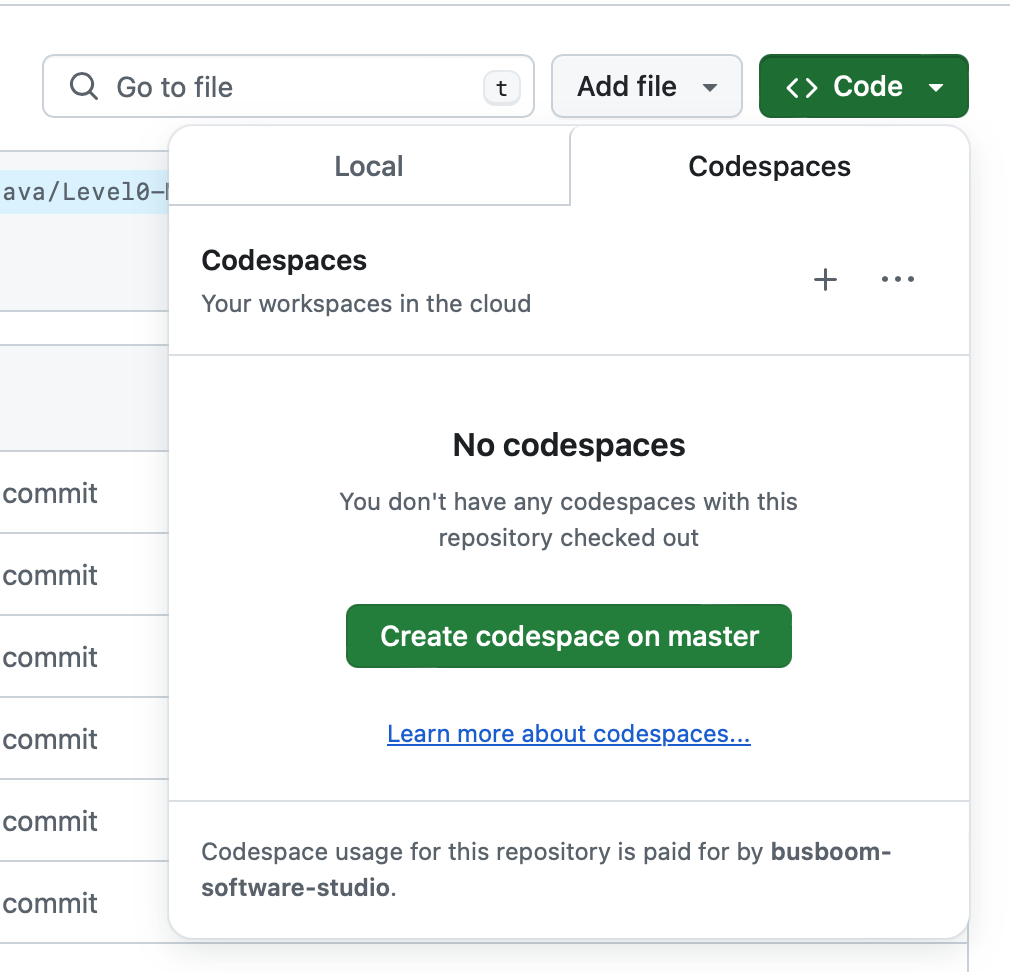
On the repository page, click on the green “<> Code” button, after the window pops up, click on the “Codespaces” tab. It will look like this:
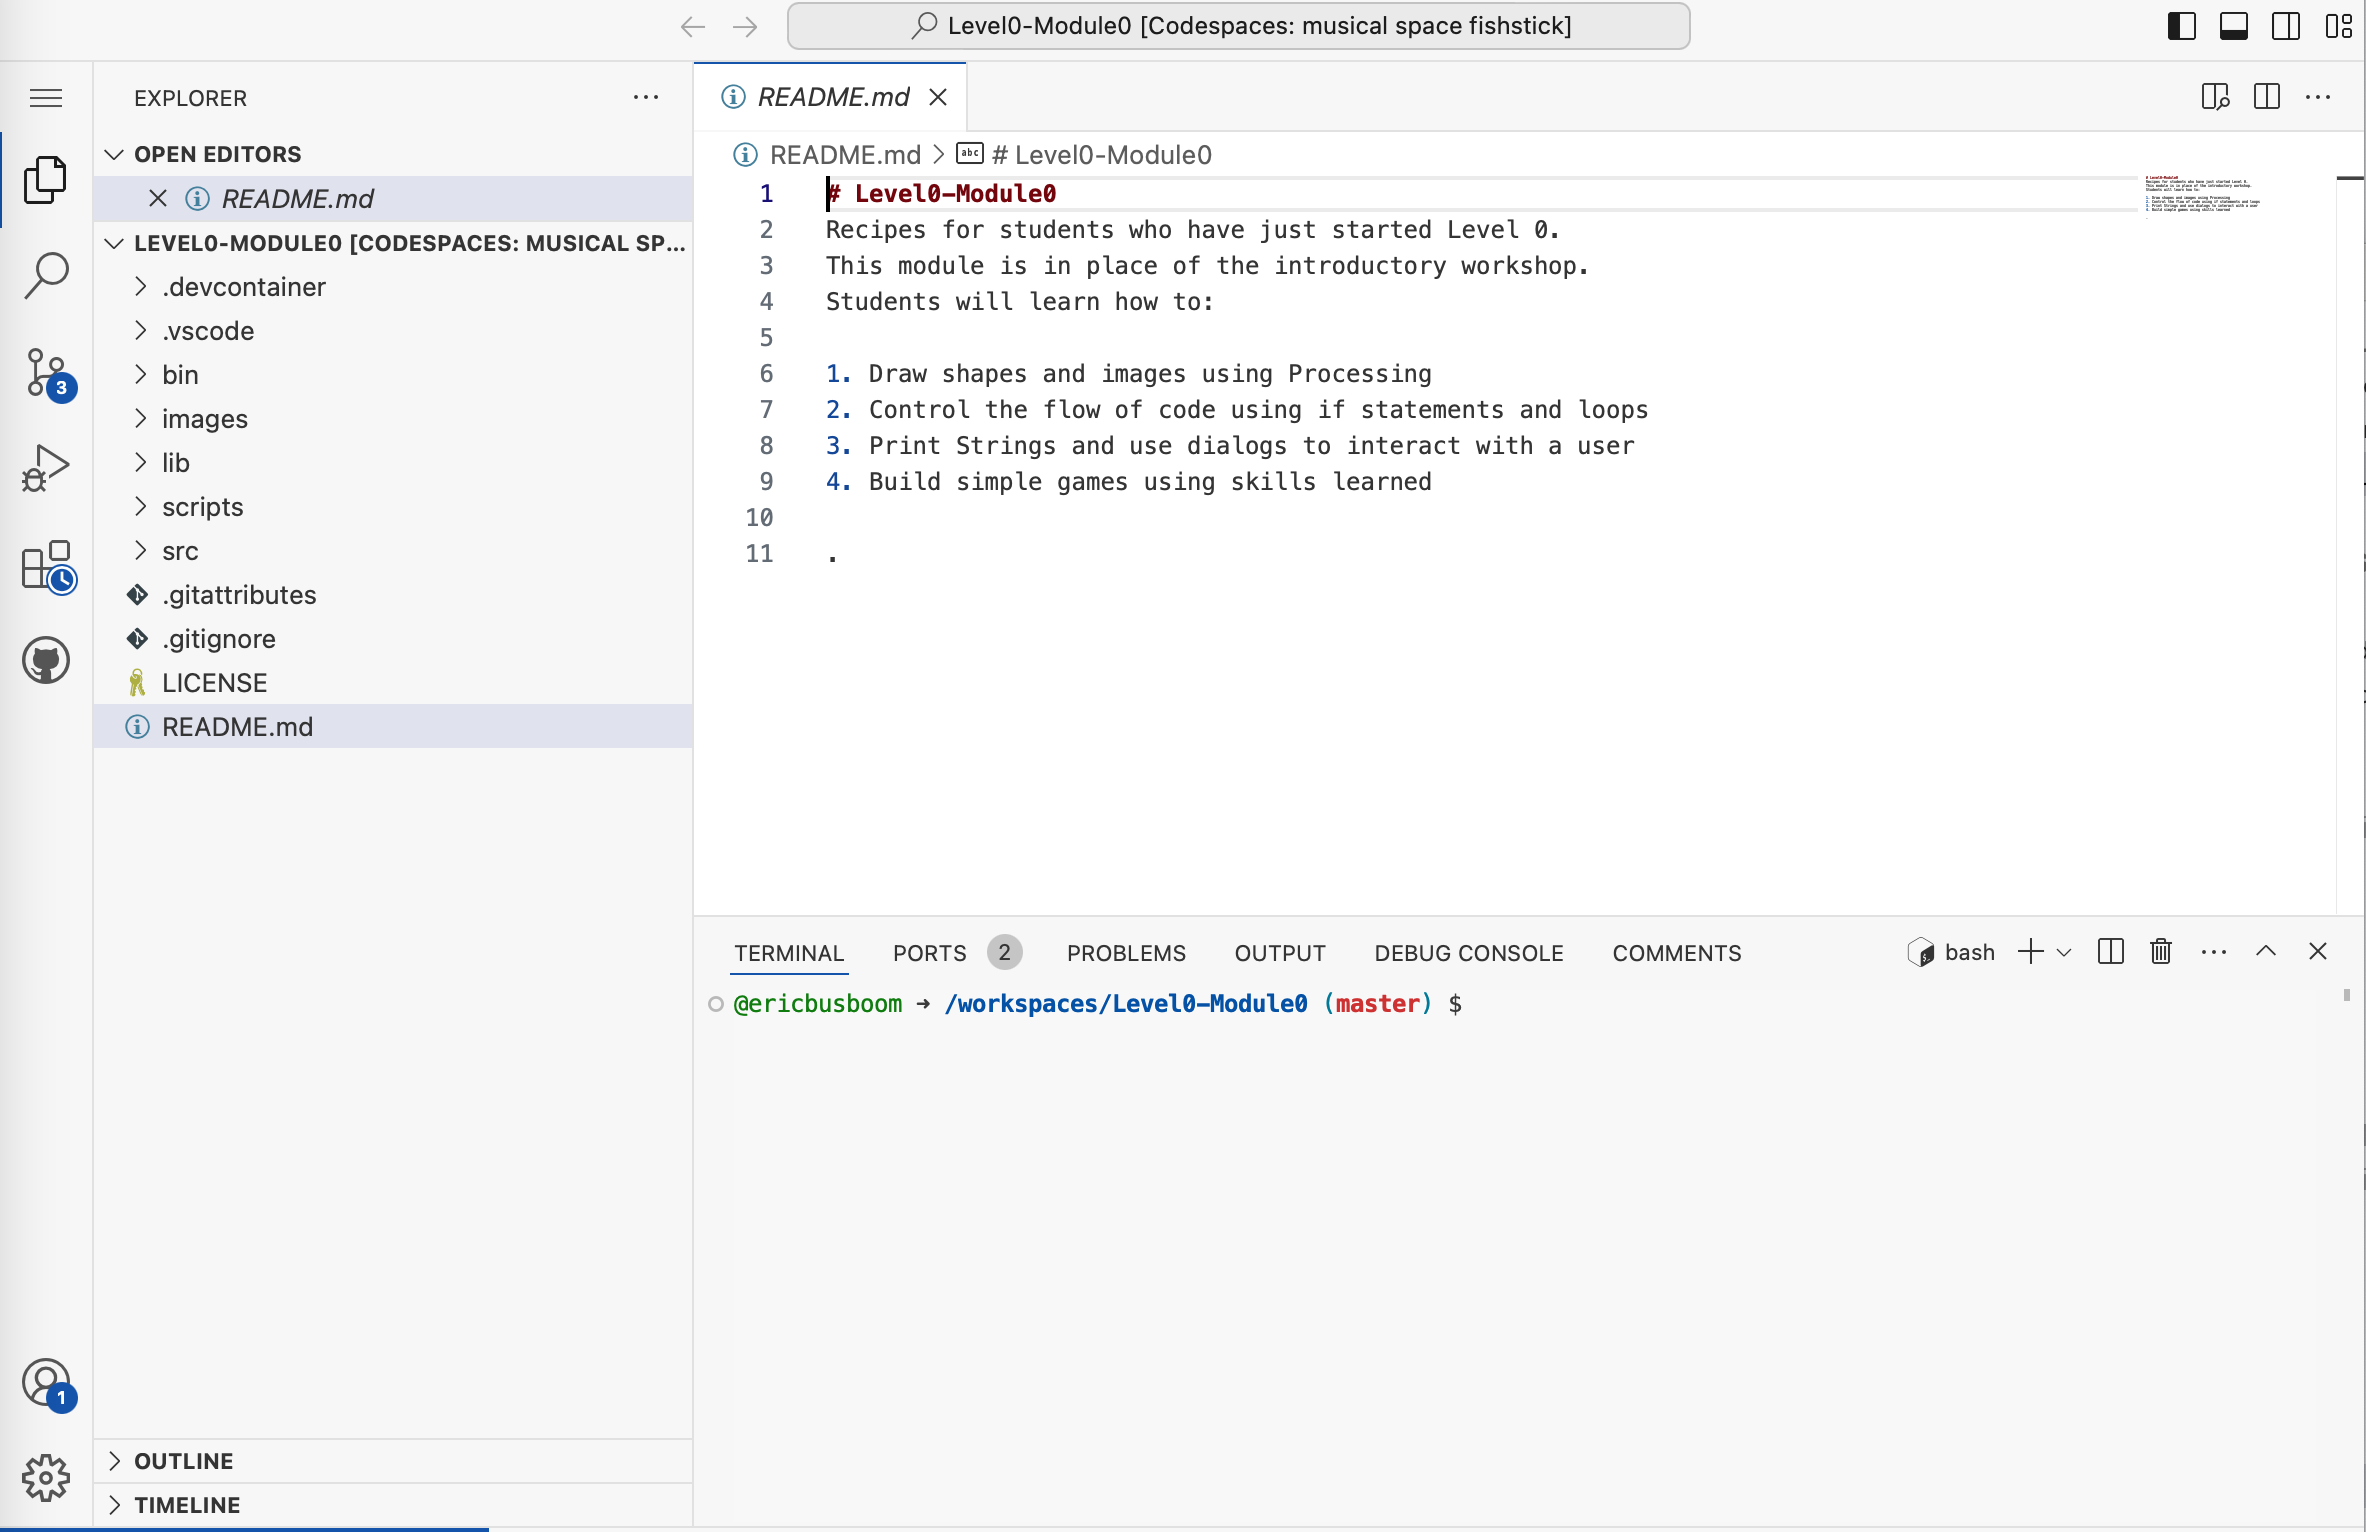
Click on the “Create codespace on master” button. A new tab or window will open, and it will read that it is “Setting up your codespace”. This may take a few minutes. When it is done, you will have a Visual Studio Code window, which will look like this:
Open a Virtual Screen on the Web
Your Codespace is running your code in a data center far away, and that server doesn’t have a screen, so if you want to see your program output, you have to create a virtual screen.
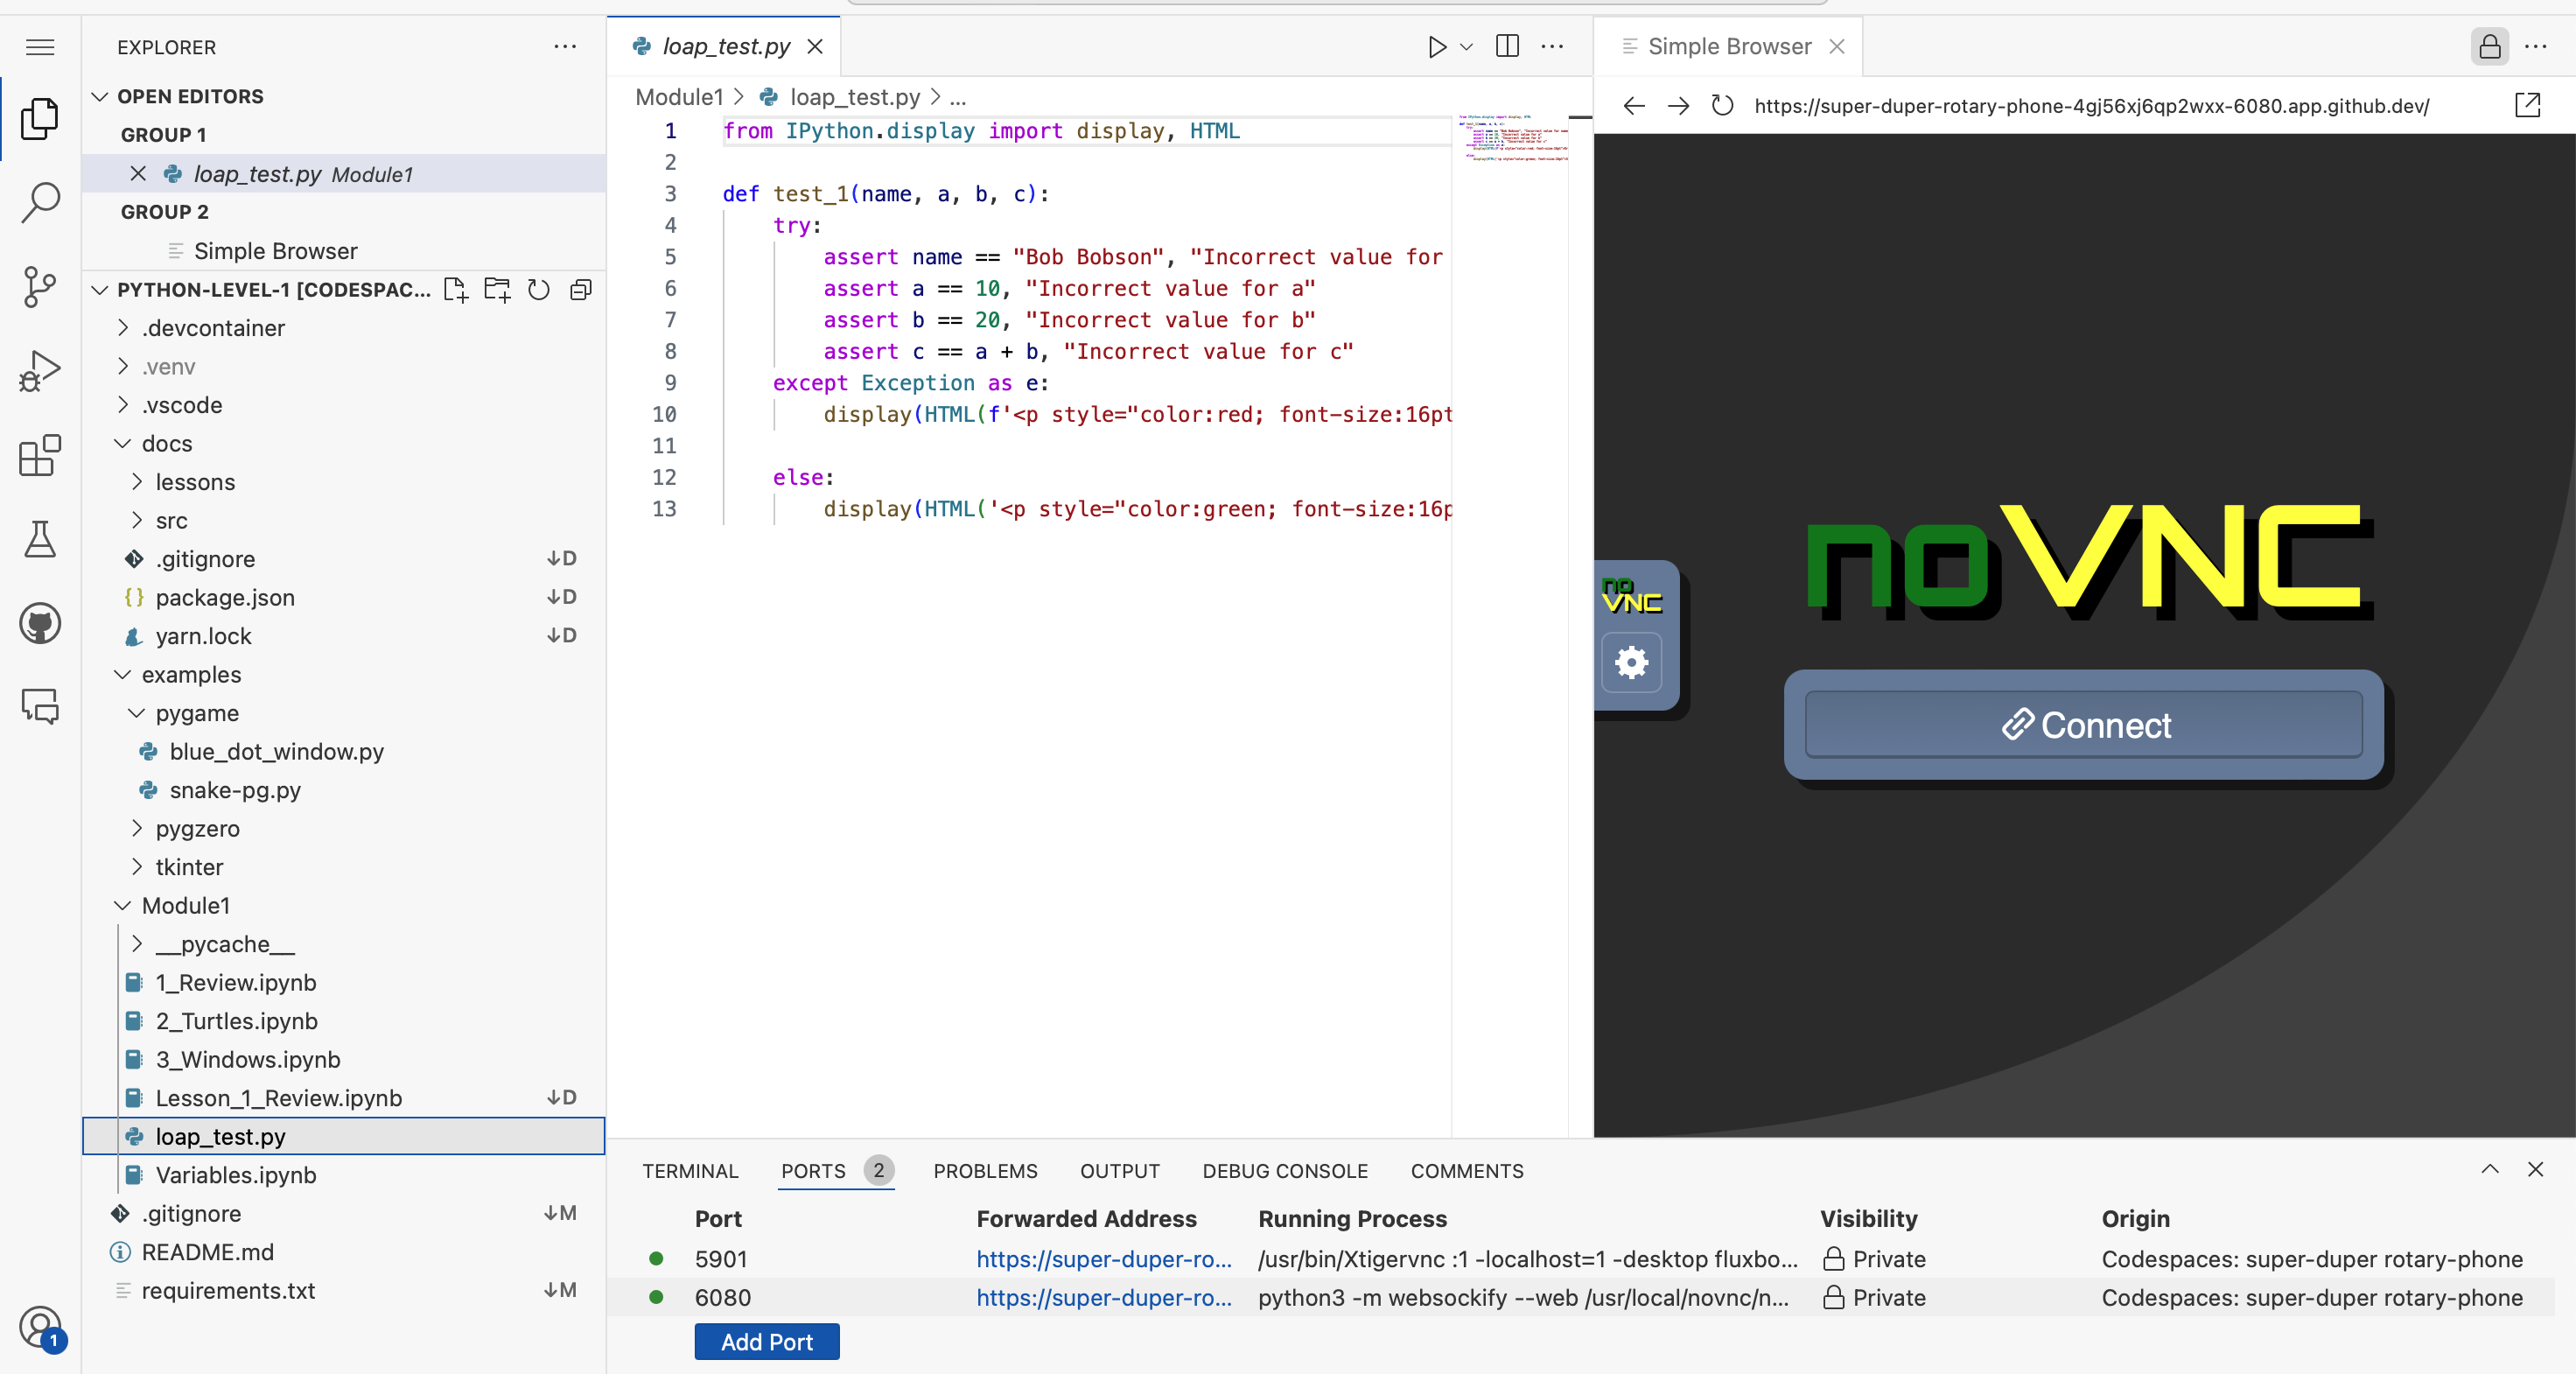
In the bottom pane of the VSCode window, click on the “PORTS” tab. ( If you don’t see a “PORTS” tab, you probably can skip this step. )

Hover over the “Forwarded Address” for port 6080. You will see a small icon that looks like a split box with a magnifying lens Click on it. This will open a new browser window with a “noVNC” logo.
You might need to drag the browser window to the right side of the screen. Your screen should look something like:
Click on “Connect”. If it asks for a password, enter the passwod: “code4life”
Now you have a virtual screen running. When your program writes to the screen, it will show up in this window.