# Getting Started with Codespaces
## Create a Codespace
A Codespace is basically Visual Studio Code running on the web. If you use VS Code
on your local machine, Codespaces will be very familiar.
### Use the Button
You can create codespace for the Python Level 1 repository by pressing the button below.
 Open in Codespaces
### Manual Process
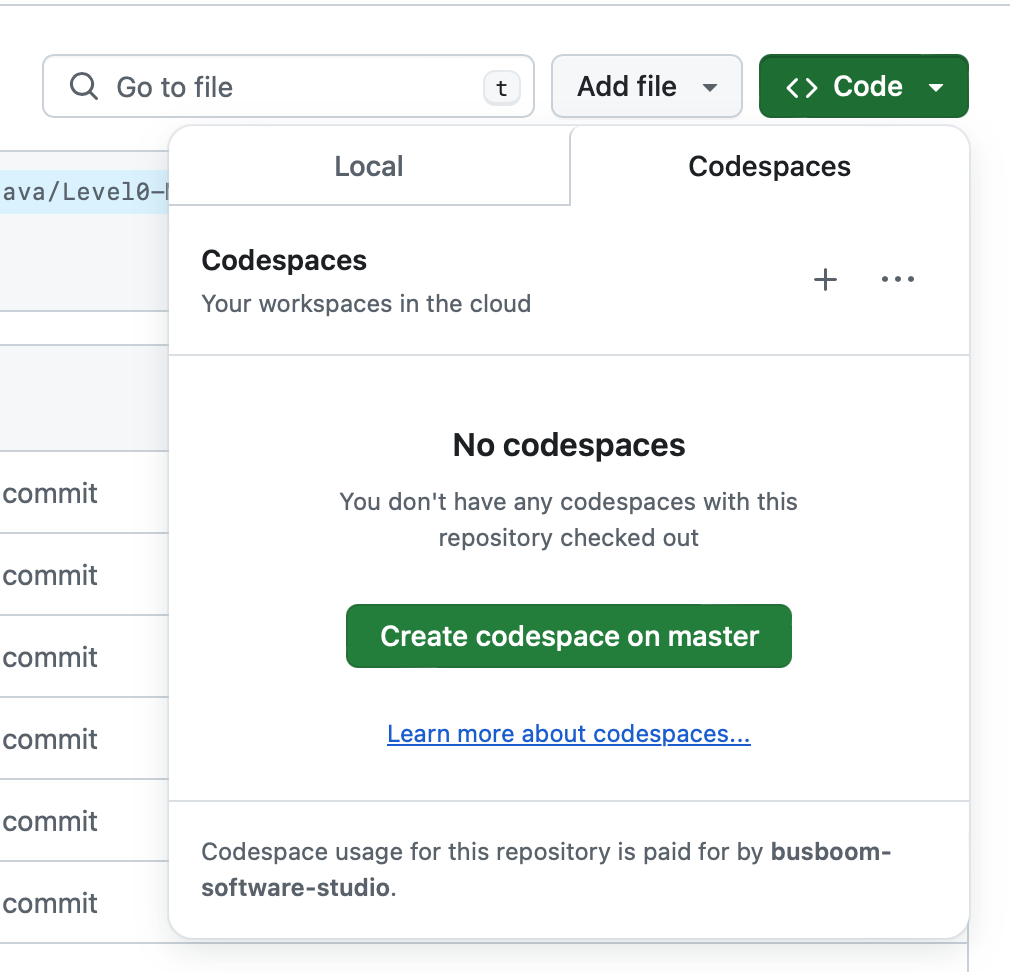
On the [repository page](https://github.com/league-curriculum/Python-Level-1), click on the green "<> Code" button, after the window
pops up, click on the "Codespaces" tab. It will look like this:
Open in Codespaces
### Manual Process
On the [repository page](https://github.com/league-curriculum/Python-Level-1), click on the green "<> Code" button, after the window
pops up, click on the "Codespaces" tab. It will look like this:
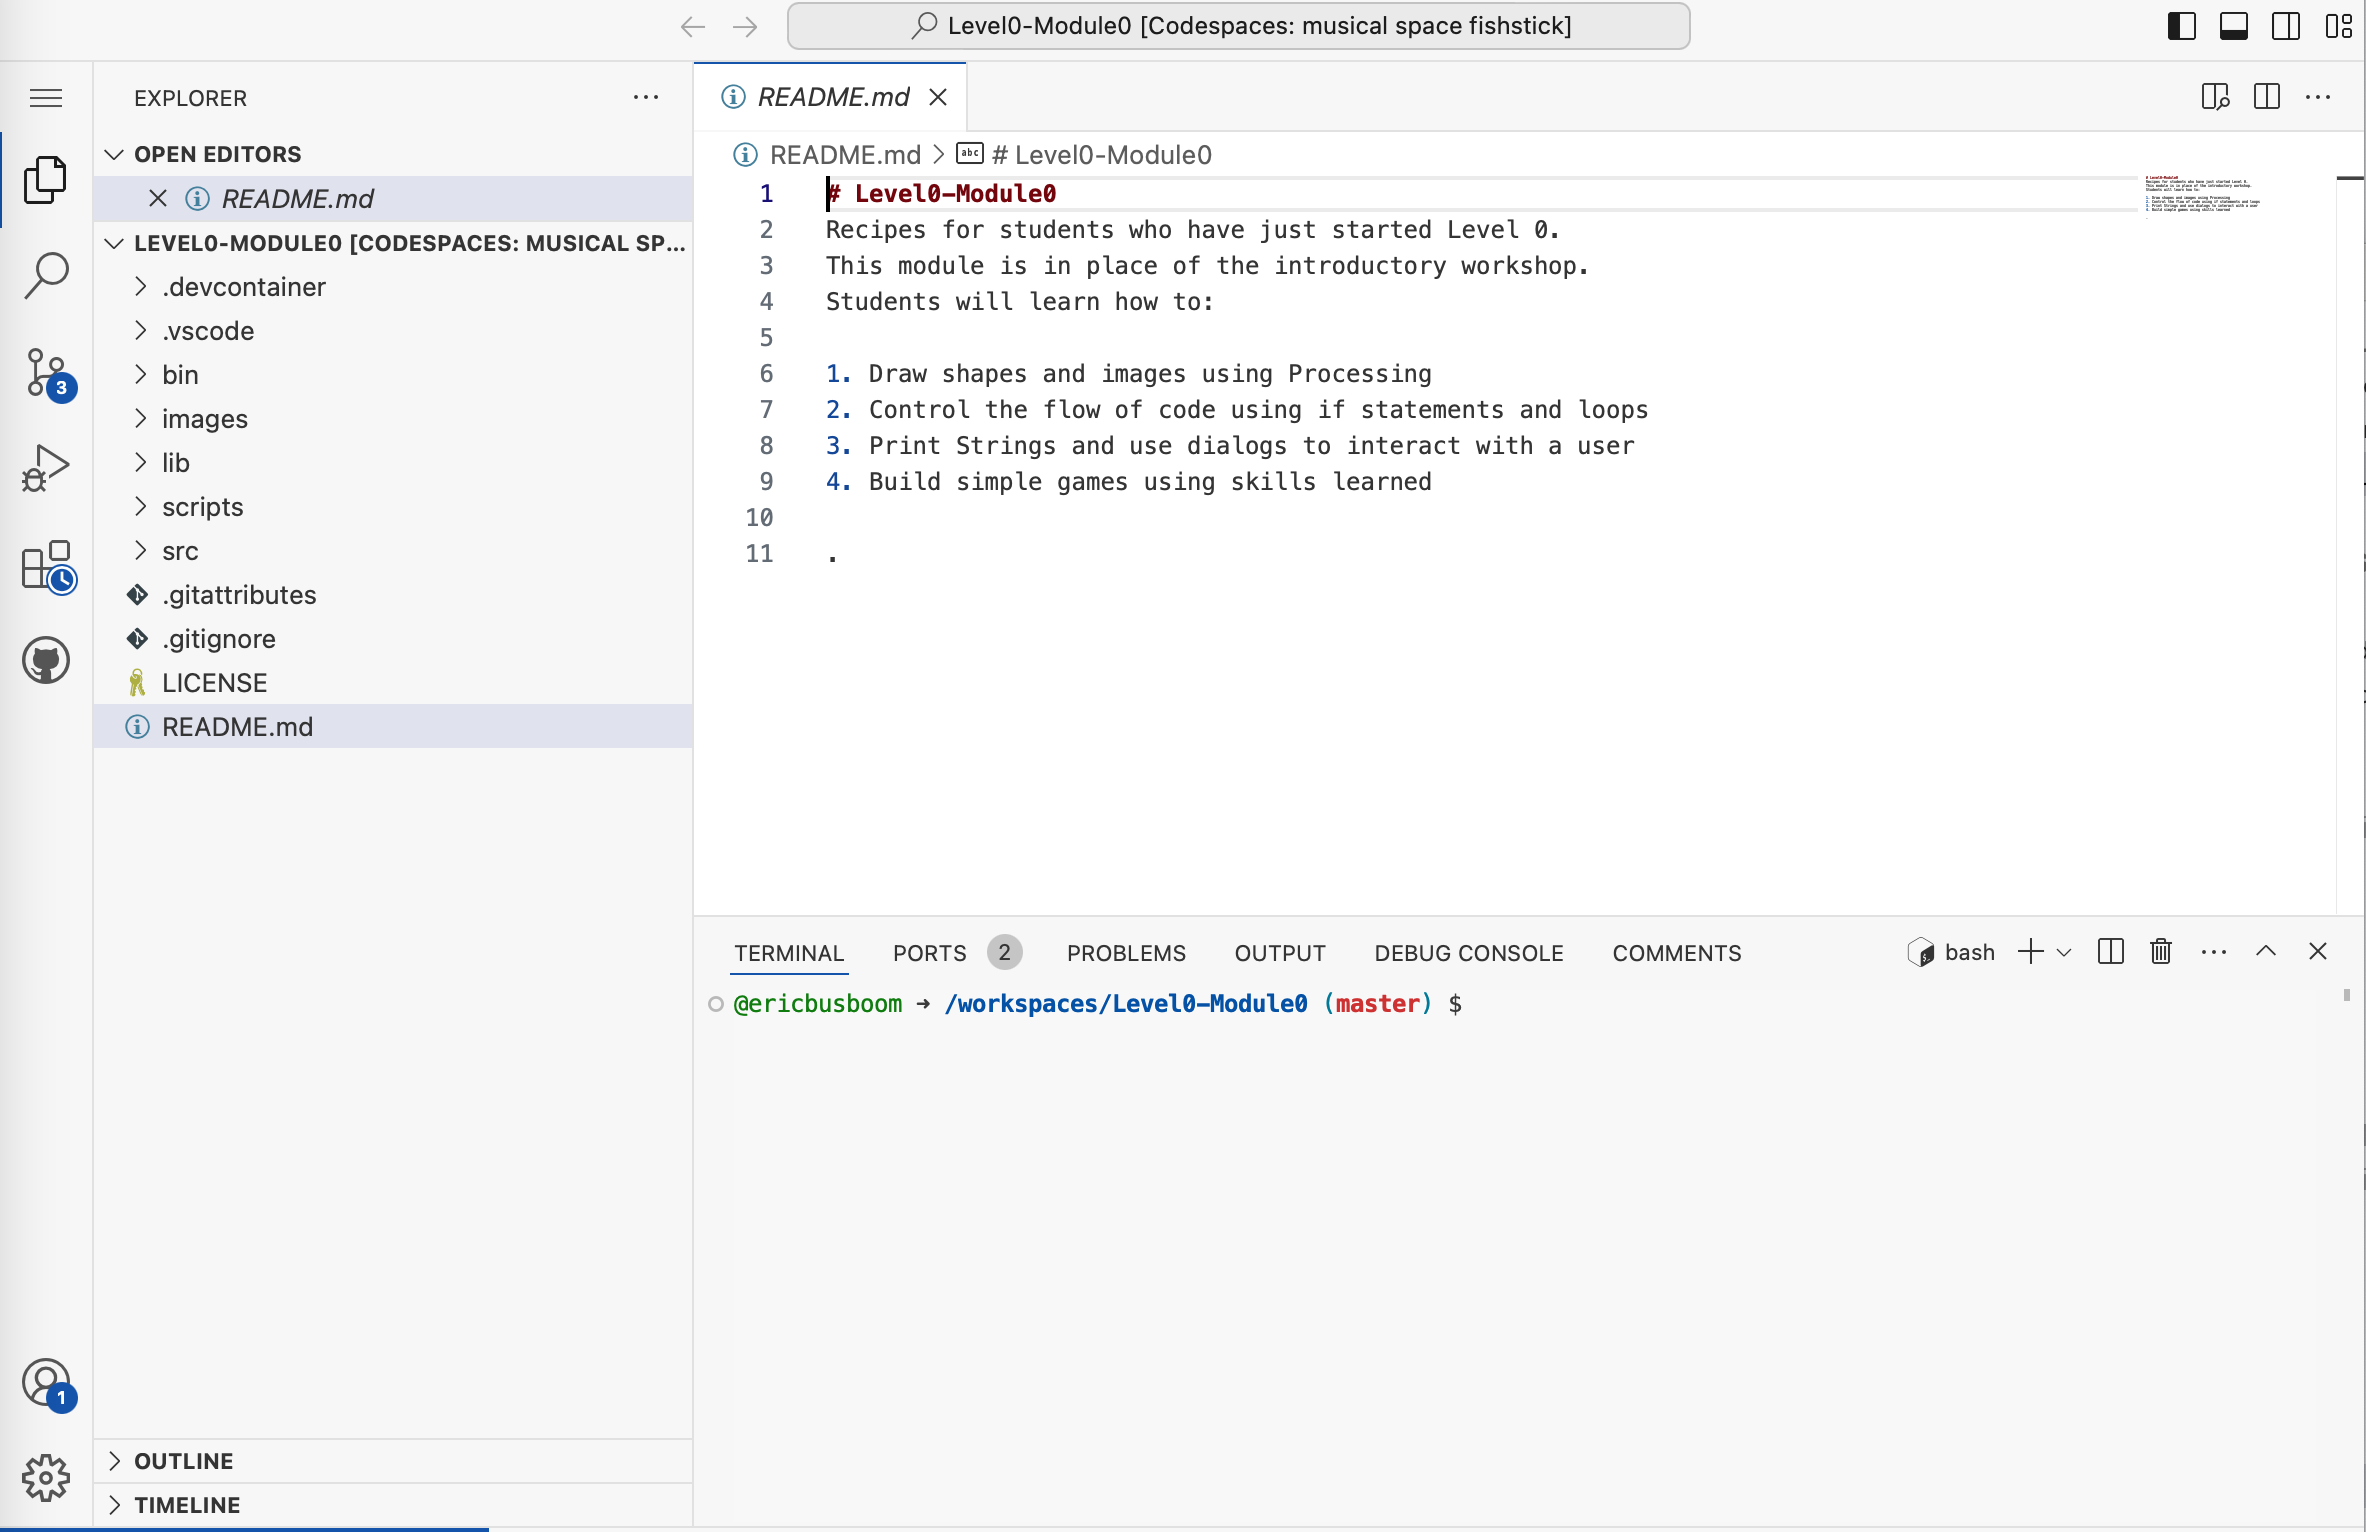
 Click on the "Create codespace on master" button. A new tab or window will open, and
it will read that it is "Setting up your codespace". This may take a few
minutes. When it is done, you will have a Visual Studio Code window, which will look like this:
Click on the "Create codespace on master" button. A new tab or window will open, and
it will read that it is "Setting up your codespace". This may take a few
minutes. When it is done, you will have a Visual Studio Code window, which will look like this:
 ## Open a Virtual Screen on the Web
Your Codespace is running your code in a data center far away, and that server
doesn't have a screen, so if you want to see your program output, you have to
create a virtual screen.
In the bottom pane of the VSCode window, click on the "PORTS" tab. ( If you don't see a
"PORTS" tab, you probably can skip this step. )
## Open a Virtual Screen on the Web
Your Codespace is running your code in a data center far away, and that server
doesn't have a screen, so if you want to see your program output, you have to
create a virtual screen.
In the bottom pane of the VSCode window, click on the "PORTS" tab. ( If you don't see a
"PORTS" tab, you probably can skip this step. )
 Hover over the "Forwarded Address" for port 6080. You will see a small icon
that looks like a split box with a magnifying lens Click on it. This will
open a new browser window with a "noVNC" logo.
You might need to drag the browser window to the right side of the screen. Your
screen should look something like:
Hover over the "Forwarded Address" for port 6080. You will see a small icon
that looks like a split box with a magnifying lens Click on it. This will
open a new browser window with a "noVNC" logo.
You might need to drag the browser window to the right side of the screen. Your
screen should look something like:
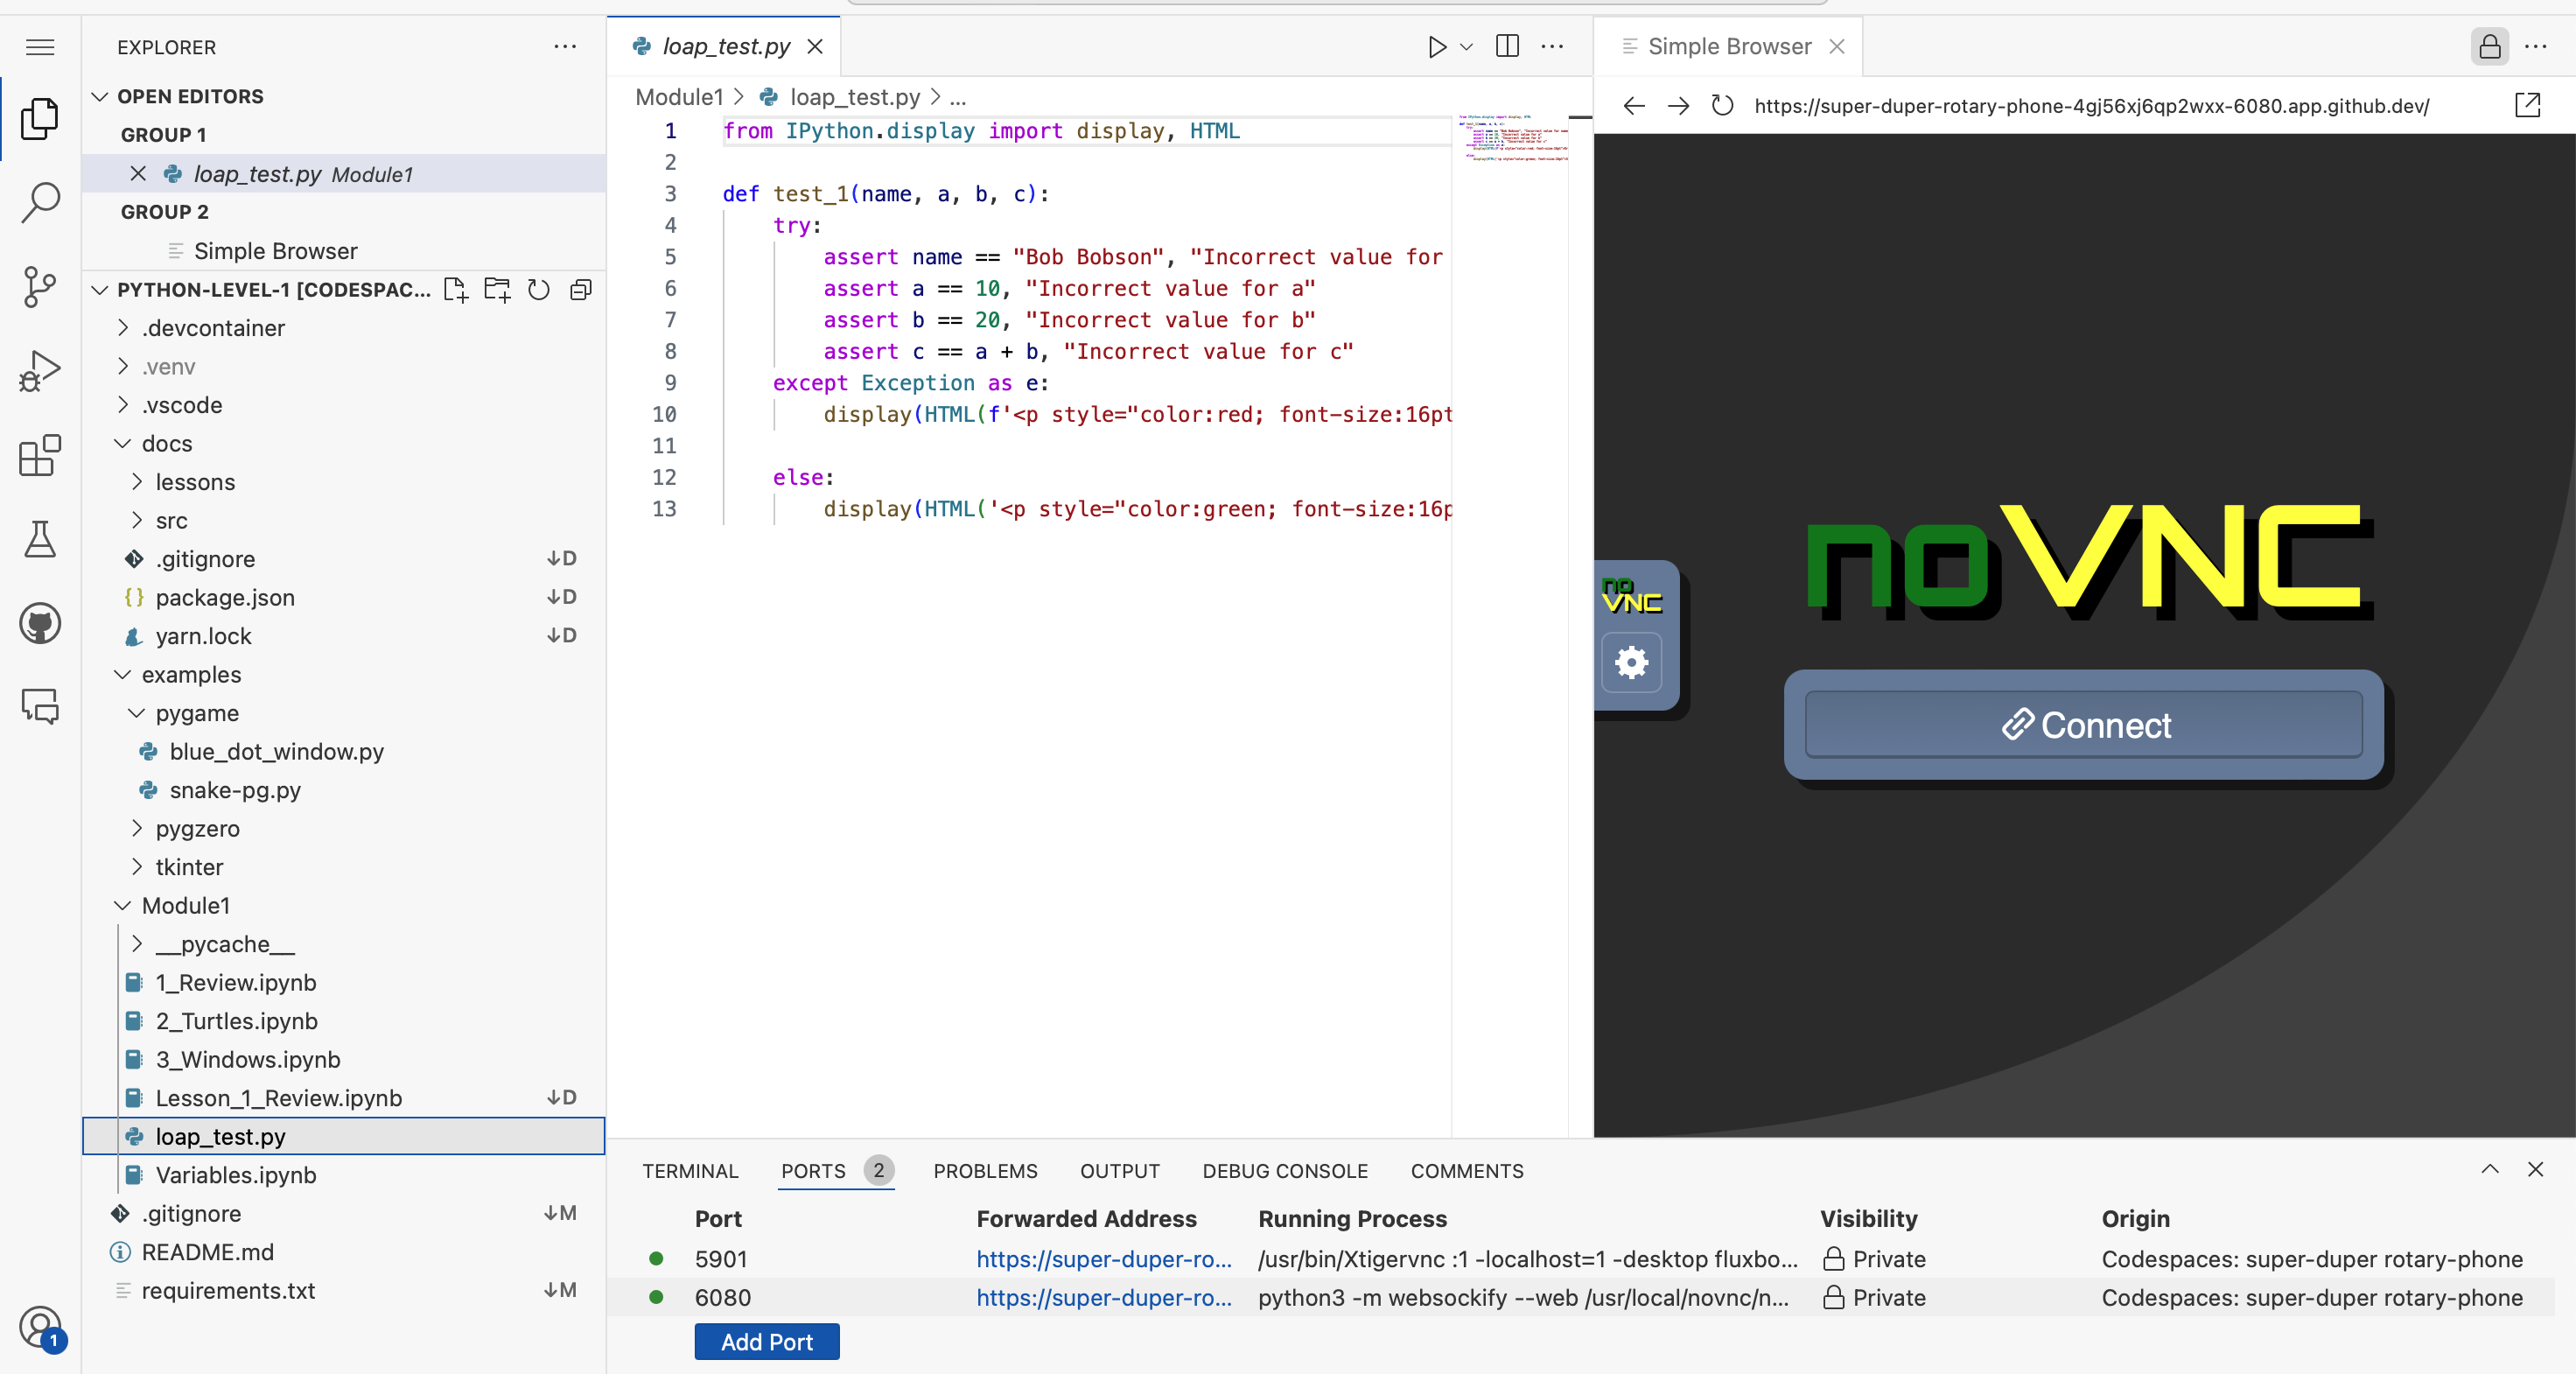 Click on "Connect". If it asks for a password, enter the passwod: "code4life"
Now you have a virtual screen running. When your program writes to the screen, it will show up in this window.
Click on "Connect". If it asks for a password, enter the passwod: "code4life"
Now you have a virtual screen running. When your program writes to the screen, it will show up in this window.